- Home
- Shop All Products
- All Garage Door Remotes
- All Gate Remote Controls
- Tilt Garage Door Parts & Handles
- Sectional Garage Door Parts
- Tilt Garage Door Springs
- Buy Garage Door Motors DIY
- Garage Door & Gate Keypads
- Garage Door And Gate Receivers
- Acdc Garage Door Remotes
- Ads Dominator Garage Door Remotes
- Aprimatic Gate Remotes
- Ahi Garage Door Remotes
- ATA Garage Door Remotes & Keypads
- Avon Smartdoor Garage Door Remotes
- B&d Garage Door Remotes
- BENINCA Gate Remotes
- Bft Garage Door & Gate Products
- Boss Garage Door Remotes
- Came Garage & Gate Remotes
- Casar Garage Door Opener Remotes
- Centurion Gate & Garage Door Products
- Centsys Gate & Garage Door Remotes
- Chamberlain Garage Door Remotes
- Cloning Garage Door Remote
- conqueror garage door remotes
- Dace Gate Remote Controls
- DEA Gate Remote Controls
- Defender Garage Door Remotes
- Digi Code Garage Door Remotes
- Ditec Gate & Garage Remotes
- Dominator Garage Door Remotes NZ
- DoorHan Gate Remotes
- Doormate Garage Door Remotes
- Doorworks Garage Door Remotes
- Easy Lifter Garage Door Remotes
- ECA Gate & Garage Door Remotes
- Elsema Garage Door & Gate Remotes
- ET Door Opener Remotes
- FAAC Gate Remote Controls
- Force Garage Door Remotes
- Garageace Garage Door Remotes
- Fushi Garage Door Remotes
- Garador Garage Door Remote Controls
- Genius Gate Remote Controls
- Gibidi Replacement Remotes
- Gliderol Garage Door Remotes
- Grifco Garage Door Remotes
- Guardian Garage Door Remote Controls
- King Kong Doors Remotes
- Lees Technology Garage Door Remotes
- Lockmaster Garage Door & Gate Remotes
- Merlin Garage Door Remotes & Keypads
- Mhouse Garage & Gate Remotes
- Motorpol Garage Door Remotes
- Motorlift Garage Door Remotes
- Motostar Gate Remotes
- Nice Garage & Gate Remotes
- Orbit Garage Door Remotes
- ORCA Garage Door Remotes
- Parker Garage Door Remotes
- Remote King garage & Gate Remotes
- Rib Gate & Garage Door Remote Controls
- Securalift Garage Door Remotes
- Smart Openers Garage Door Remotes
- Sommer Remote Controls
- Sovereign Garage Door Remotes
- SuperLift Garage Door Remotes
- Steel-Line Garage Door Remotes
- Tau Gate Remote Controls
- Tiltamatic Garage Door Remotes
- Tmt Automation Gate Remotes
- Troytec Garage Door Remotes
- Vergo Garage Door Opener Remote
- Vaskeri Garage Door Remotes
- V2 Phox Garage Door & Gate Remotes
- Windsor Garage Door Remotes
- Remote Control Sun Visor Holders
- Garage Door Motor Parts
- Services We Offer In Auckland
- DEA Gate Remote Controls
- T&C
- Shop By Motor Head
- Contact Us
- Our Easy Remote Coding Videos
- Helpful Information
- Customer Testimonials
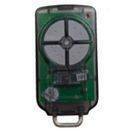
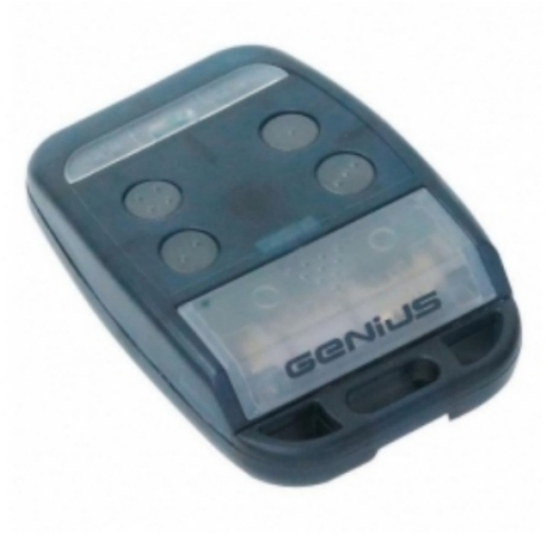
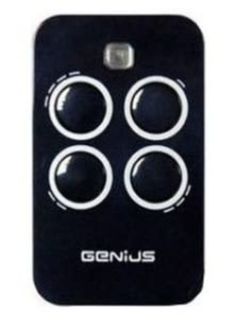
Genius Bravo Remote
Genius Bravo Gate Remote 433mhz
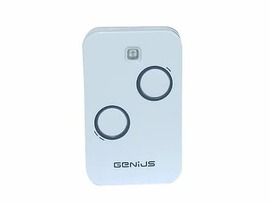
Is Now Replaced By Geniune Genius Echo Remote In The 2nd Photo ALSO REPLACES ADYX TE4433H remote GENIUS TE4433H GENIUS BRAVO
- Frequency ' 433.92MHz Coding ' Rolling Code
- Body Type ' Key-Ring Buttons '4
- Button Colour ' Black/White
- Case Colour ' Black Size ' 65x38x13mm Range ' > 40 meters
RRP:
NZ$ 105.00
Savings:
NZ$ 21.10 (a 20% discount)
Price:
NZ$ 83.90 including GST
NZ$ 72.96 excluding GST
or four payments of $20.98
with ![]() Learn More
Learn More
Genius Echo
On Sale! Don't miss out!
Coding Instructions
CODING INSTRUCTIONS
CODING VIA RECEIVER
1 - On the receiver, press the push-button for the channel you wish to
code - SW1 to store CH1 and SW2 to store CH2. LED 1 or LED 2 will light
on steady light to signal that the receiver is in learning mode.
2 - Press on the remote within 10 seconds and hold down the push-button
you wish to code for at least 1 second.
3 - If storage was successful, the LED flashes twice.
4 - After the first remote has been coded, the receiver stays in learning mode, with the LED lighted on steady light.
5 - To code successive remotes (up to a maximum of 256), repeat the operations from point 2.
6 - When 10 seconds have elapsed from coding of the last remote, the receiver automatically exits the learning
stage. You can exit the learning procedure manually, by pressing one of the pushbuttons on the receiver (SW1 or
SW2) after the remote has been stored.
CODING FROM A WORKING REMOTE
1. With your already-programmed remote control and your new remote control, proceed to the vicinity of the
receiver.
2. On the pre-programmed remote control, simultaneously press the P1 and P2 buttons and hold it until the two
LEDs L1 and L2 flash on the receiver. Release the buttons.
3. While the two LEDs will flash on the receiver, press the button you want to program. The LED (L1 or L2) which is
assigned to the button will flash.
4. While the LED is flashing, press on the new remote control, the button to be programmed. The receiver LED will
flash, then lights up permanently. Release the button.
5. After 10 seconds, the LED on the receiver goes out.
6. Your new remote control is now programmed.
Reviews
Product Enquiry
Contact Details
Request More Information
Details of the product above will be automatically included with your enquiry.
View your shopping basket or Browse other items in Genius Gate Remote Controls.
|
© Copyright New Zealand Garage Door Remotes - Site Map Phone: 021 172 4470 Auckland New Zealand |
